PrusaSlicer ships with a small set of built-in shapes like cubes, cylinders, spheres, a helper disk, and a recycling symbol. What most people miss is that the same menu can hold your own models. If you keep dropping the same logo, the same modifier block, or the same little part onto the plate, you can load it into the Shape Gallery once and pull it up any time after that. This lesson walks through the whole process, from opening the gallery to placing your own object on the bed.
LESSON5 STEPSFREE
Author
Dabble Dad
Steps
5
Updated
Jun 2026
Reading
10 MIN
YOUR PROGRESS
0 / 5 STEPS · 0%
01
Open the Shape Gallery
Additional Information
If you have not already reviewed the configuration folder lesson, please check it out as this is a continuation. The Hidden Side of PrusaSlicer
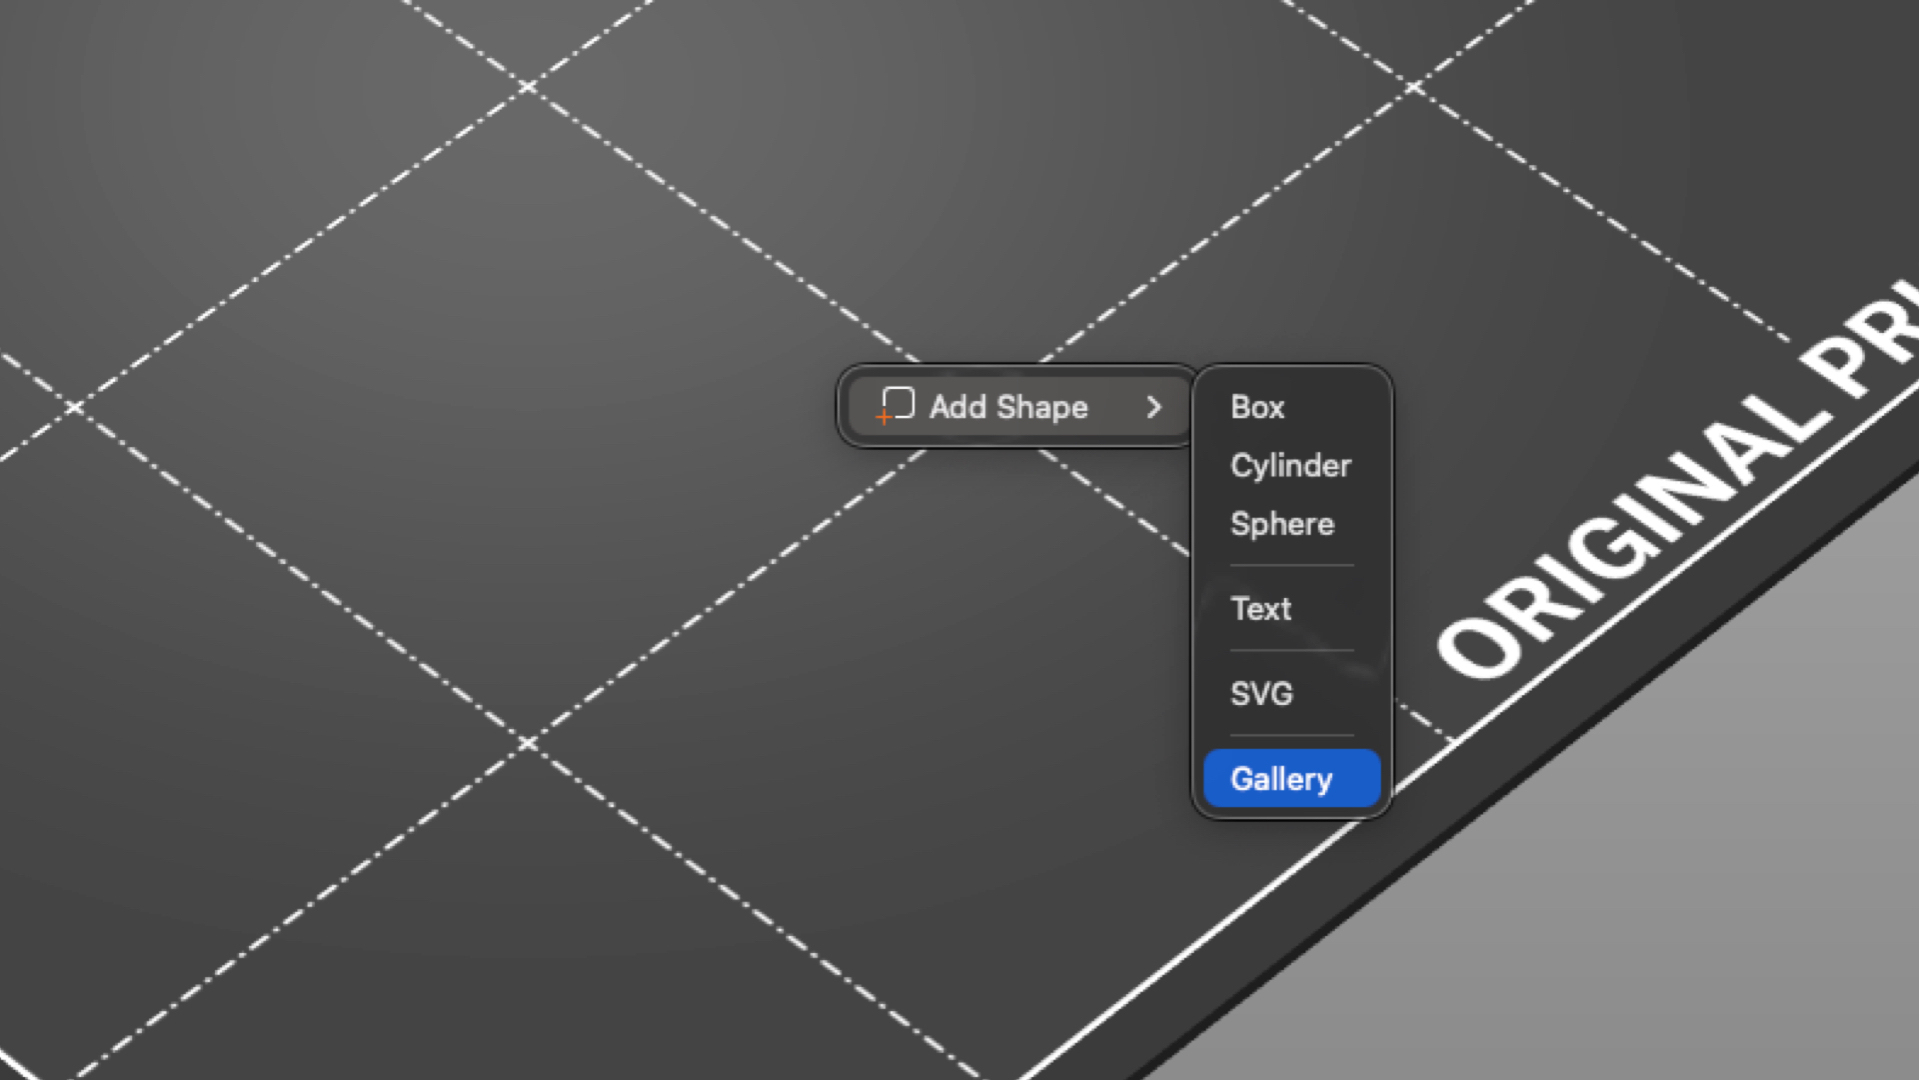
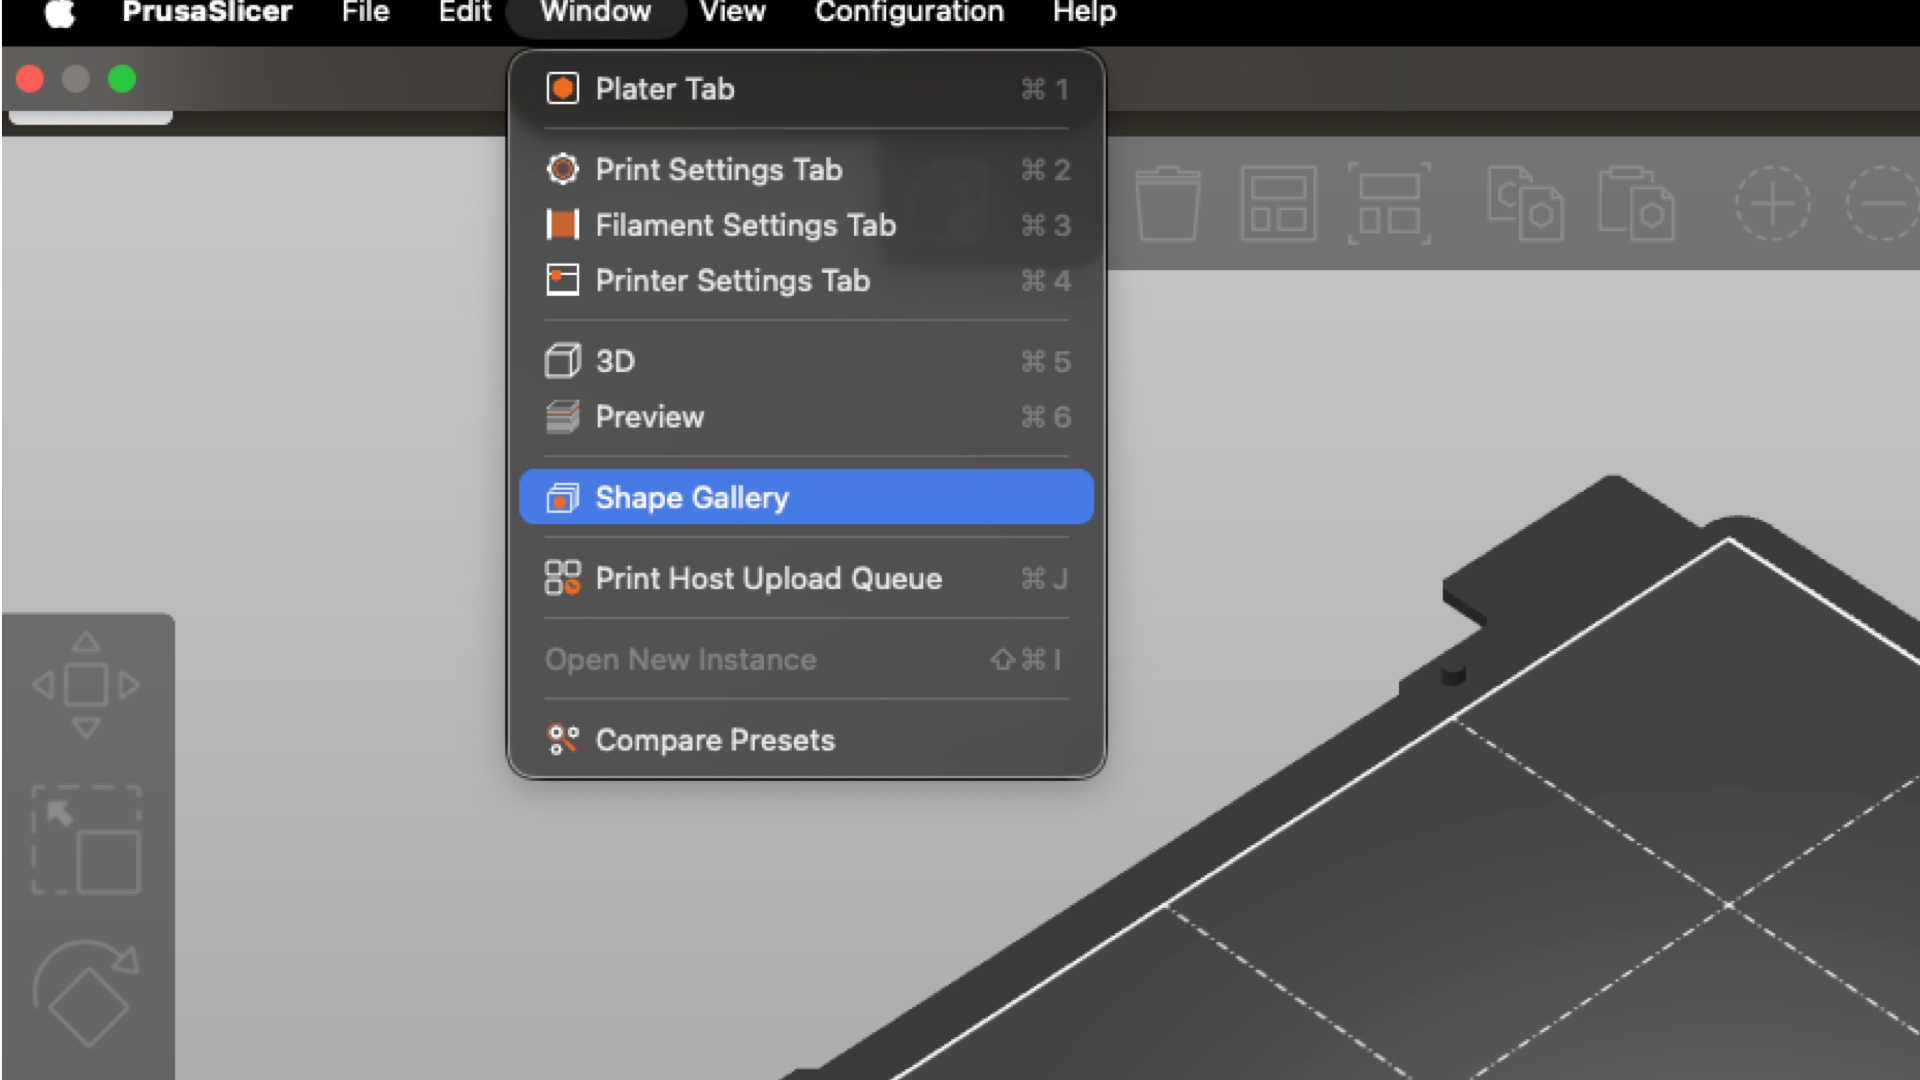
There are two reliable ways in. The first is the Window menu at the top of PrusaSlicer, where you will find Shape Gallery listed below the 3D and Preview options. The second is the Add Shape button menu which opens the same gallery and is usually faster once you know where it lives. Right click (or Ctrl-Click) anywhere on t he screen and click Add Shape->Gallery.
If you try it and fry it, re-install it to reset it.
When the dialog opens you will see the system shapes first. These are the primitives Prusa includes by default. Your custom objects, once you add them, sit in the same grid and behave the same way. Nothing here is locked off, so there is no risk in clicking around to get familiar with it.
02
Prepare the Model You Want to Add
Before importing, make sure your STL or OBJ is a clean, watertight mesh. A model with holes or flipped normals will look fine in the thumbnail and then slice badly, so it is worth checking in your modeling tool first. This matters more for objects you intend to print than for rough modifier blocks, but clean geometry is the safer habit either way.
Keep in mind that STL files carry no unit information, so PrusaSlicer reads the model in millimeters on import. If your shape comes in at the wrong size, that is almost always a units mismatch from the source program. You can rescale after placing it on the bed, but getting the export right saves a step.
A good first candidate is something you genuinely reuse: a company or channel logo, a countersunk screw pocket you use as a negative, or a small calibration block. Pick something practical rather than something fancy.
Pro Tip
If you plan to use the shape as a negative volume to cut a logo into a print, model it as a solid shape now. You set the negative behavior later in PrusaSlicer, not in the mesh itself.
03
Import Your Object Into the Gallery
With the gallery open, click the Add button. PrusaSlicer asks you to point to a file, so select your STL or OBJ and confirm. The object loads into the gallery and gets an automatically generated thumbnail, and from this point it stays there until you remove it yourself. You can add several files in one pass if you want to build out your collection.
One thing to know going in: the gallery is strictly alphabetical and has no folders yet. If you are adding more than a few shapes, name your files with a short prefix so related items group together. Something like “LOGO_” or “MOD_” at the front of the filename keeps your custom shapes from scattering across the list.
Warning
Custom shapes are tied to your PrusaSlicer configuration on this machine. They do not travel with a project file, so if you move to another computer you will need to import them again.
The auto-generated thumbnail is functional but plain, and for a logo or a branded part a custom image reads much better at a glance. Right-click your custom shape in the gallery and choose the option to change its thumbnail, then point PrusaSlicer to a PNG you have prepared. A square image at a consistent size keeps the grid looking tidy. I always add a shadow effect to each of my custom parts. You will also see the custom models you uploaded do not have a lock icon next to it.
This step is purely cosmetic, so skip it if you are only adding a quick modifier you will rarely look at. For shapes you reach for often, a clear thumbnail pays for itself every time you scan the gallery.
04
Place the Shape and Put It to Work
Select your custom shape and confirm to drop it onto the bed. From here it behaves like any normal object. You can move, rotate, and scale it with the standard tools, and you can slice and print it directly. Nothing about it being a gallery object limits what you can do with it afterward.
The same shapes also work as modifiers. Right-click a model on the plate, choose Add modifier, and you can pull from the gallery there too. This is where a reusable logo really earns its place, since you can set it as a negative volume to emboss your branding into a print without remodeling anything.
Pro Tip
Once you have repeated this a couple of times it stops feeling like a feature and starts feeling like part of your normal setup. That is usually the sign a workflow is worth keeping.
05
Final Thoughts
The Shape Gallery is one of those quiet features that does not look like much until you stop re-importing the same file for the tenth time. Load your common shapes once, give the important ones a clean thumbnail, and they are waiting for you in every project. Try it with a single logo or modifier first, and once that click feels automatic, add the rest.
Comments