A perimeter generator is the part of PrusaSlicer that creates the wall paths for each layer of your print.
To change the type, you must be in either Normal or Expert Mode
Think of your 3D model as the plan. The perimeter generator turns that plan into nozzle movement. It decides where the nozzle travels, how many wall lines are needed, and how to handle thin or narrow areas.
This matters because your printer nozzle has a real size. A 0.4 mm nozzle cannot perfectly draw every tiny shape. When a model has thin walls, small text, or tiny logos, the slicer has to make choices about what can actually be printed.

Classic is the older perimeter generator in PrusaSlicer. It creates wall paths by offsetting the outline of the model using a mostly consistent extrusion width.
In simple terms, Classic tries to draw the print walls with lines that stay about the same width. This makes Classic easy to understand and predictable.
For example, if your extrusion width is around 0.45 mm, Classic tries to fit wall lines into the model using that width. This works well when the model’s wall thickness matches the nozzle and extrusion width nicely.

The problem happens when the wall does not divide evenly.
A 1mm wall does not perfectly fit two 0.45 mm lines. Two lines would use about 0.90 mm(maybe, leaving a small leftover space. Classic then has to decide what to do with that tiny space. Sometimes it leaves a gap. Sometimes it adds small gap fill. Sometimes a tiny detail may not print cleanly.
Classic is not bad. It is just less flexible:
Pro-side of this, it can be useful when you want predictable wall behavior, especially on simple mechanical parts with walls designed around your nozzle size.
Con-side it struggles with smaller text, logos, thin walls, narrow tabs, and details that do not fit cleanly into fixed-width paths.
Arachne is the newer perimeter generator and is the standard choice in modern PrusaSlicer versions. Instead of using mostly fixed-width wall lines, Arachne can adjust extrusion width as needed.
That means Arachne can make a perimeter slightly wider or slightly thinner to better fit the model.
This is a big deal for small details. If a wall is too thin for two normal perimeter lines, but too wide for one normal line, Arachne has more room to make a smart decision. It can adjust the line width instead of only relying on fixed paths or gap fill.
Arachne is especially helpful for small raised text, engraved text, logos, thin walls, tapered shapes, small clips, tabs, decorative details, you get it…

A simple way to remember it is this:
Classic is like drawing with one marker that mostly stays the same width.
Arachne is like drawing with a marker that can get a little wider or thinner depending on the space.
That does not mean Arachne can print impossible details. Your nozzle still has limits. But it does give PrusaSlicer more control when details get small or walls change thickness.
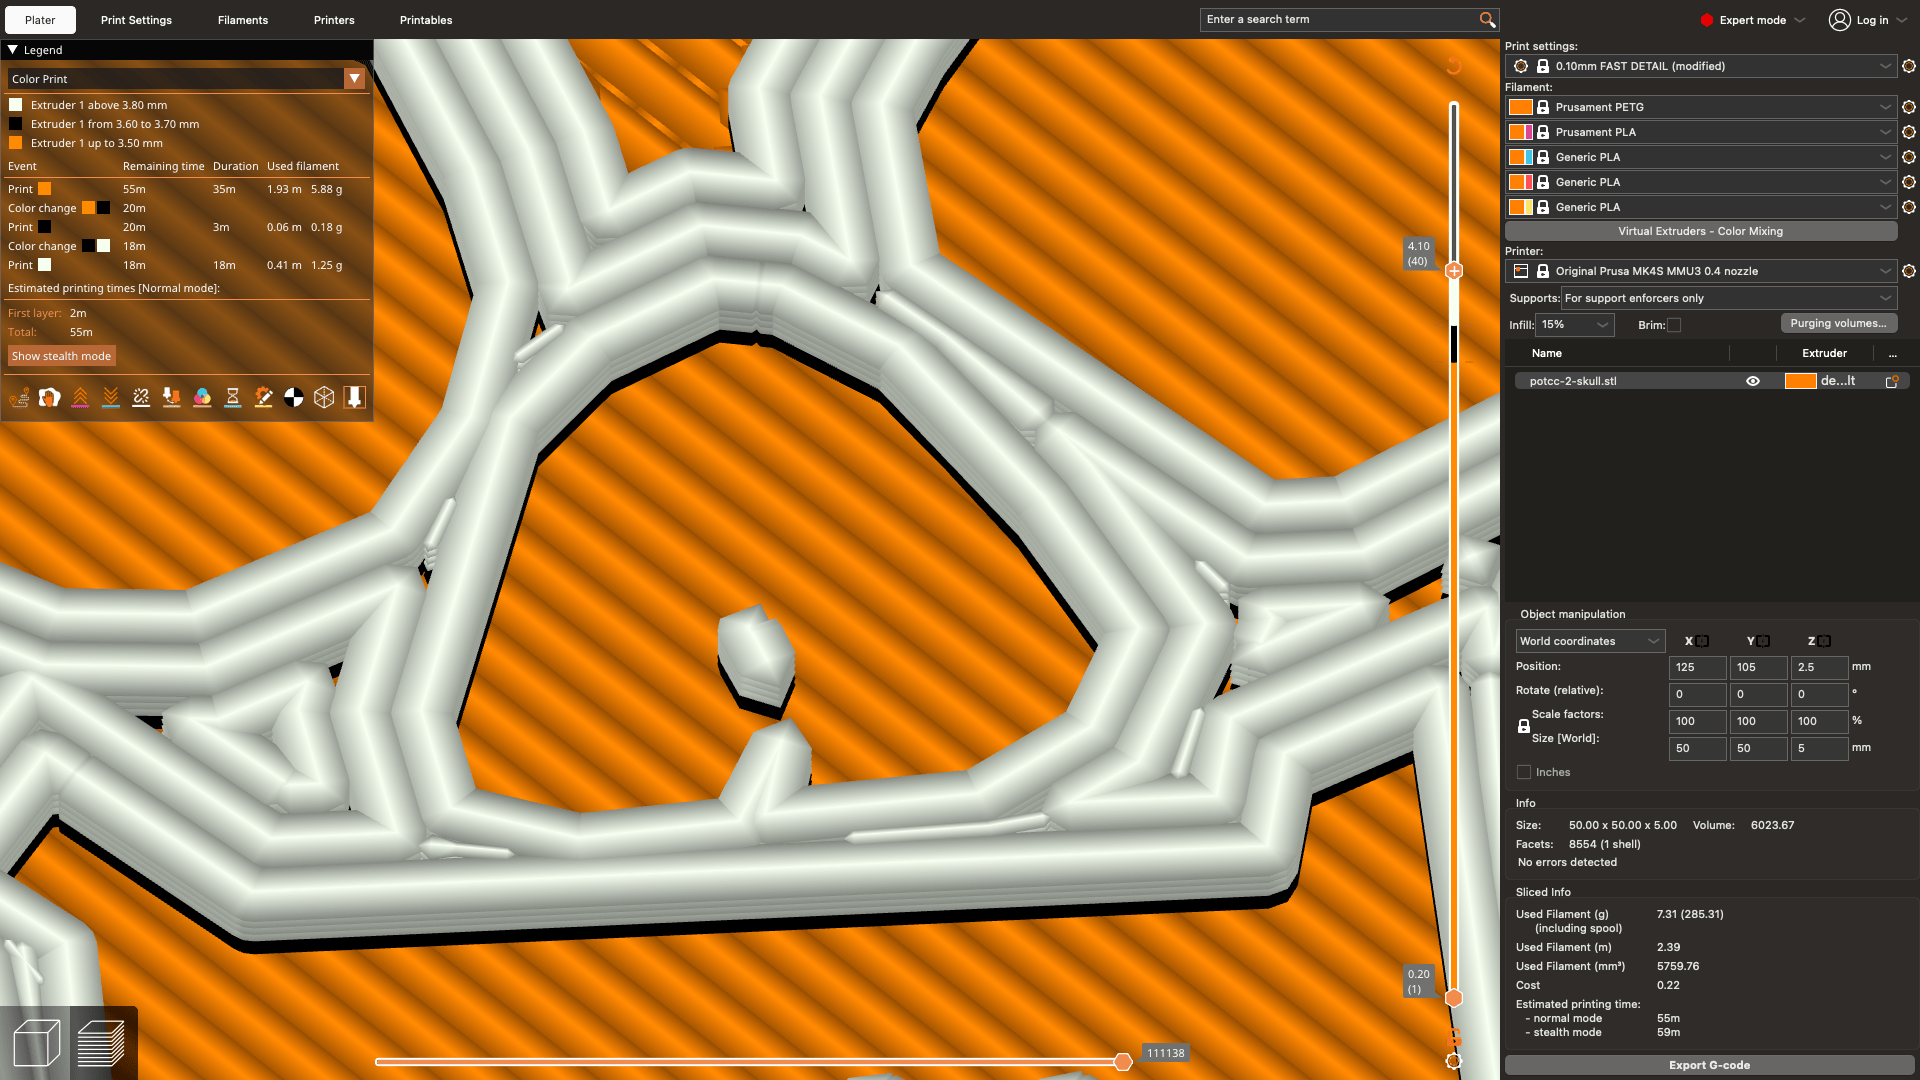
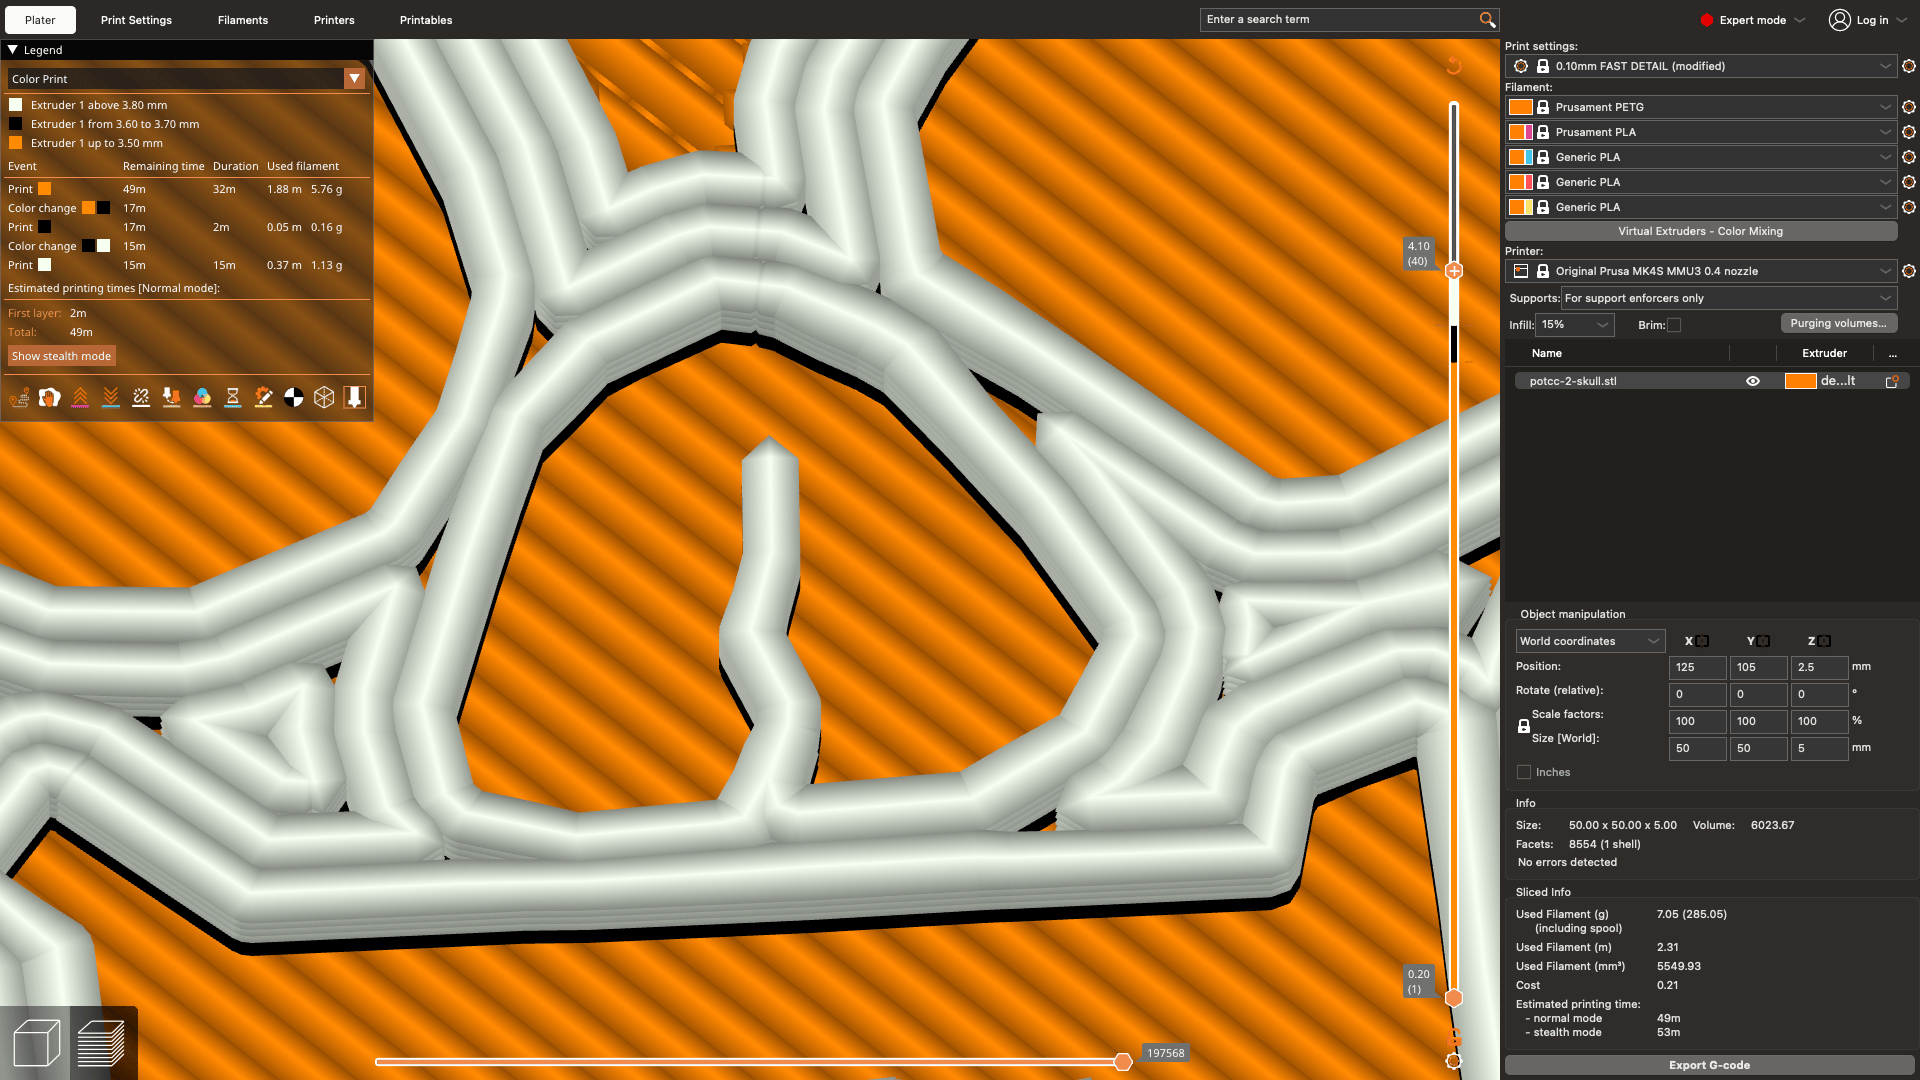
Small text and logos are hard for the FDM printers because the strokes in the letters may be thinner than a normal perimeter line. With Classic, those strokes may break apart or look rough in the sliced Preview.
Arachne has a better chance of keeping those shapes because it can vary extrusion width.
This is why a logos, letters, or fine details may look cleaner when sliced with Arachne. The letters may stay more complete and the slicer may need fewer tiny gap-fill movements.
The same thing can happen with thin walls. A thin wall might not be wide enough for two normal lines, but one normal line may not fill it well. Arachne can adjust the wall line to better match the available space.
The best way to understand this setting is to test both options on the same model.
Open your model in PrusaSlicer. Start with Arachne, slice the model, and go to Preview mode. Zoom in on the areas that matter, such as text, thin walls, corners, holes, clips, and logos.
Then switch the perimeter generator to Classic. Slice again and look at the same areas in Preview. 8Do not judge only by the normal 3D model view. The model view shows what the file looks like. Preview shows the actual nozzle paths.
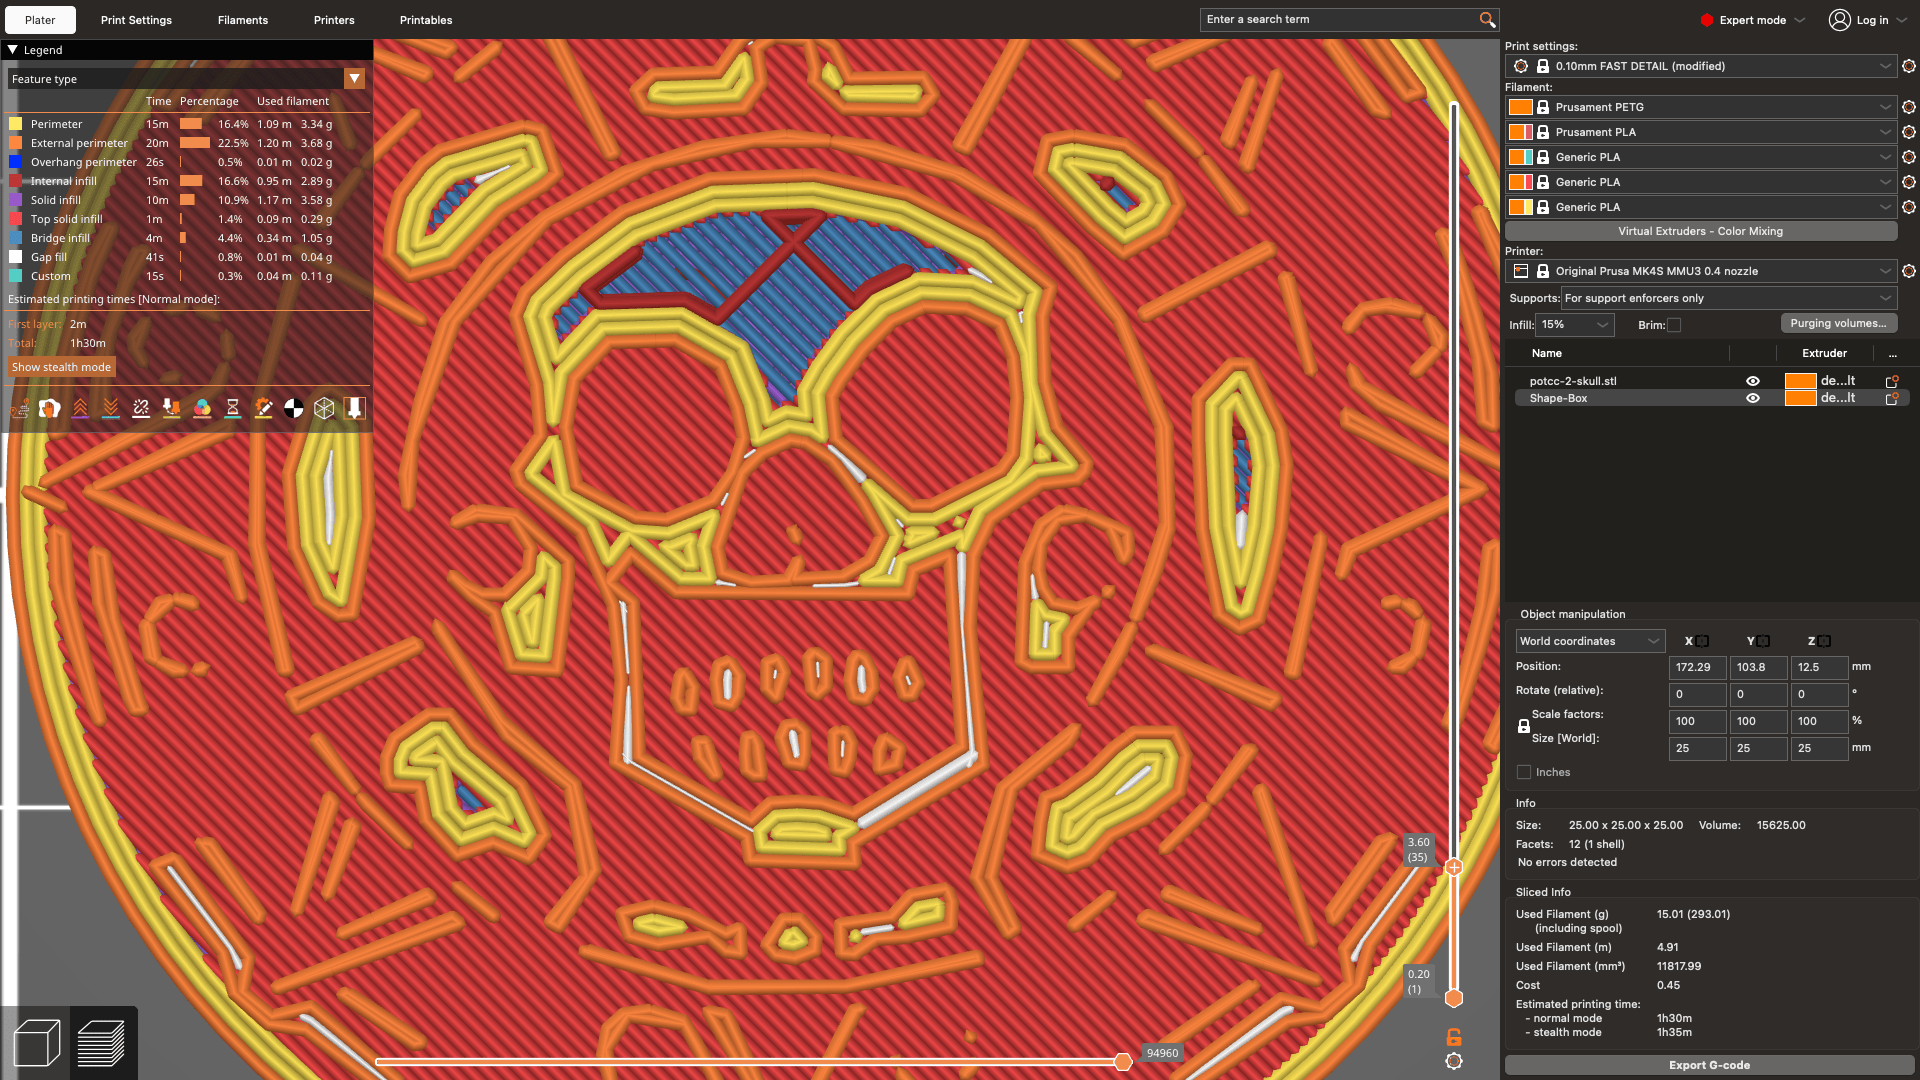
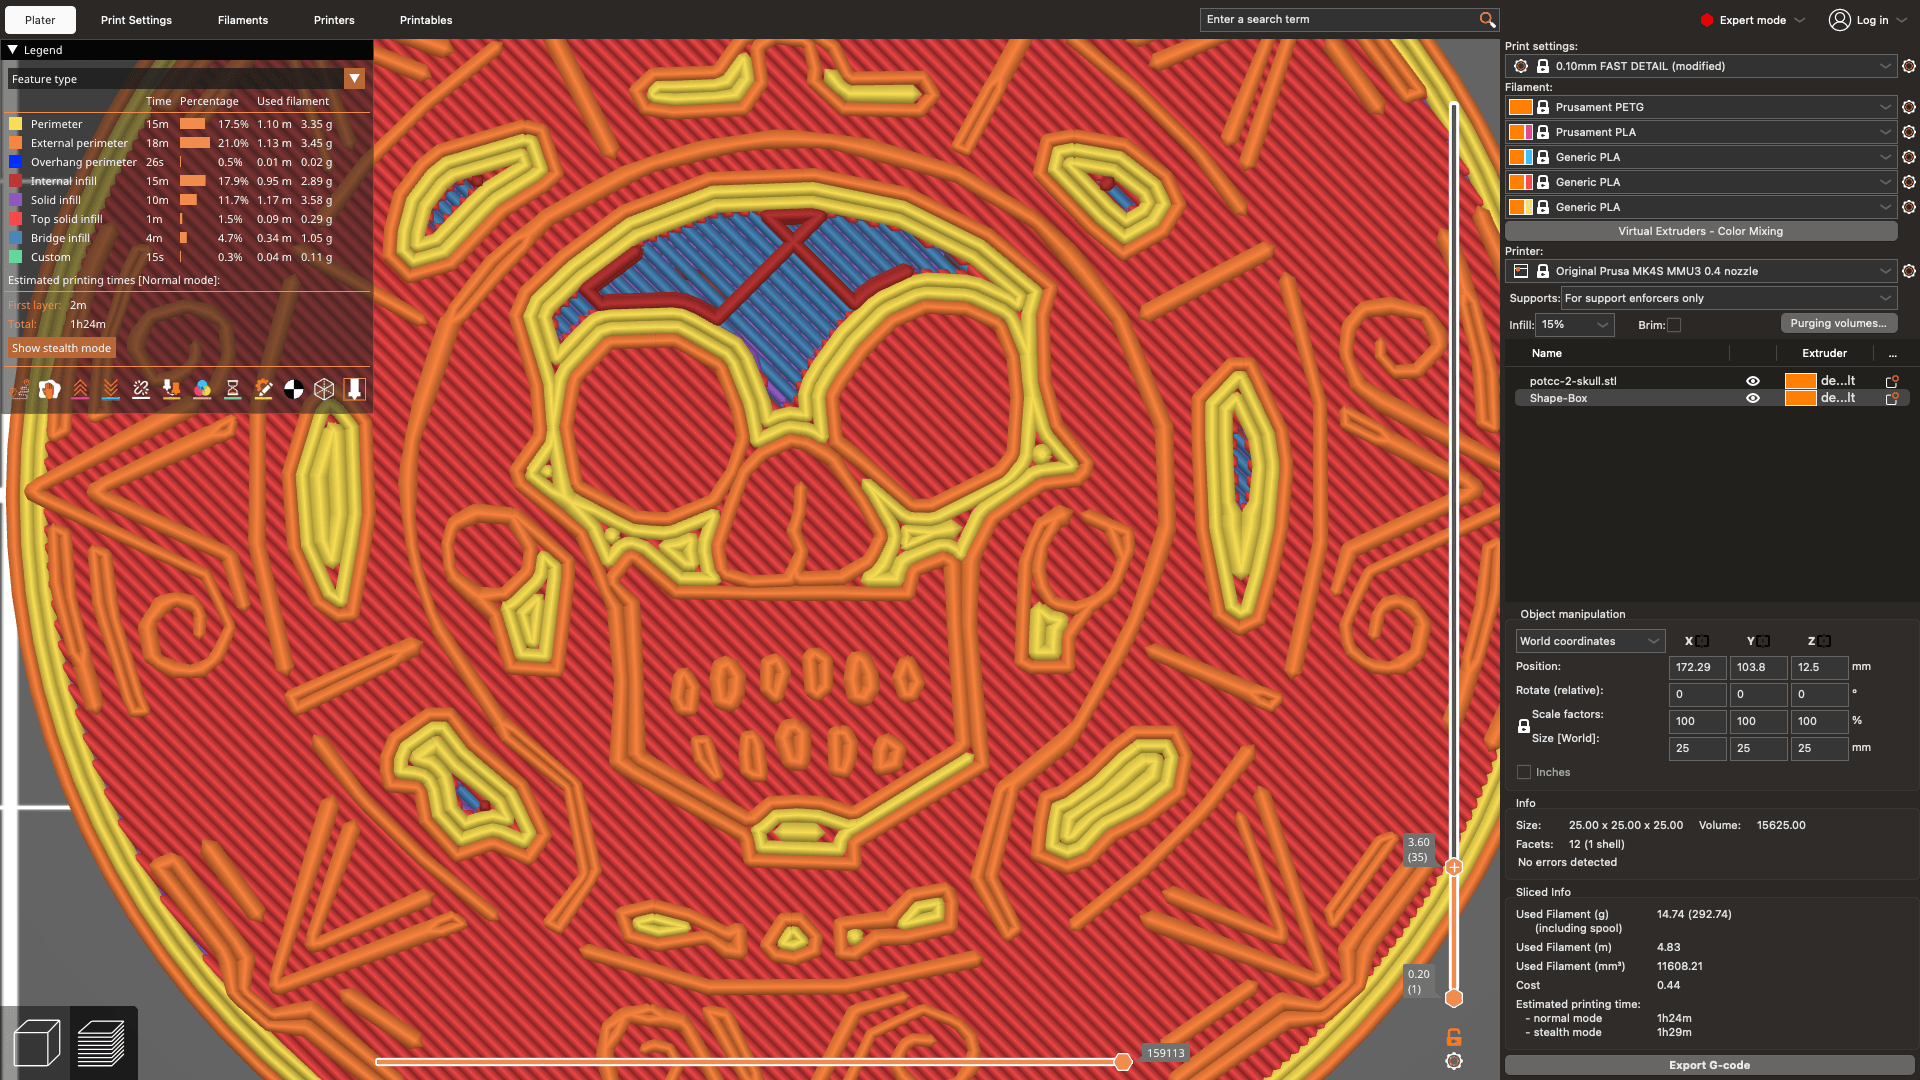
Ask yourself these questions while comparing:
Did either version lose a small feature?
Does the text look complete?
Are there tiny gaps between walls?
Is there a lot of gap fill?
Do the corners and thin sections look clean?
Would one version be easier for the printer to actually print?
For most prints, start with Arachne. It is the modern default for a reason. It usually handles changing wall thickness, small text, logos, and thin details better than Classic.
Use Arachne when the model has small features, decorative details, curved shapes, thin walls, labels, name plates, logos, or geometry that changes thickness often.
Classic still has a place. Use it when you are troubleshooting a print that looks strange with Arachne. It can also help when you want the older, more predictable wall behavior.
| Type | Pros | Cons |
|---|---|---|
| Arachne | Arachne is usually the better starting point for everyday printing, especially when the model has thin details or small lettering. | Arachne can sometimes create wall transitions that look different than expected. If that happens, switch to Classic and compare the Preview. |
| Classic | Classic is useful as a backup setting when you want to compare results or troubleshoot odd slicing behavior. | Classic is usually not the best choice for tiny text, logos, or thin walls because it has less flexibility with line width. |
Use Arachne first.
That is the easiest rule for most PrusaSlicer users. It is better suited for modern slicing and usually gives better results on thin walls, small text, logos, and detailed models.
Use Classic when you need to troubleshoot, compare, or get more predictable old-style perimeter behavior.
The most important habit is checking Preview mode. Do not just slice and hope. Look at the actual toolpaths. Zoom in on the small details. Compare Arachne and Classic before printing.
Once you understand what the perimeter generator is doing, this setting stops feeling mysterious. It becomes another tool you can use to slice smarter.
Anyone can suggest a change to this post. Your suggestion goes to the author for review.
Comments